「球磨」詳細写真
KUMA detail
images
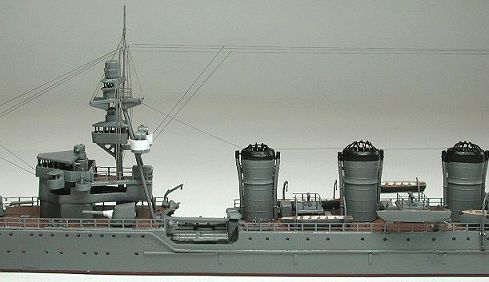
「球磨」のもっとも顕著な特徴でありその識別ポイントである、くさび型艦橋と頂部がふくらんだ3本煙突をクローズアップしてみましょう。些細なことですが、 「球磨」クラスでは前部魚雷発射管の向きが「長良」クラスと反対になっています。
Let's try to focus on this 3 chimneys top expanded and the wedge
style bridge. These are the most obvious characteristic points
which distinguishes KUMA with other KUMA class and NAGARA class.
Although it is a trivial case, the direction of the front torpedo
tube of KUMA class is opposite with NAGARA class.

この「球磨」も艦首波切り板をつけ忘れていまして、張り線も終わり全て完成してから急遽追加工作しました。艦橋から前部魚雷発射管室に行く手前に、パラベーンと魚雷積み込みダビットが設置されています。このパラベーンですが、キットのように甲板にじか置きするのではなく、垂直な壁からサポートが出ていて、そこに置くようになっています。ついでに、「長良」等では、この垂直な壁に設置したようです。
I made and added the wave limit board of the bow hurriedly after
even all the work especially tension lines finished because I
forget this board to attach.
The paravanes and torpedo loading davits are placed in front of
torpedo tube room after the bridge. These paravanes were put on
the special support which was out from a vertical wall. At the
same time NAGARA class placed paravanes to this vertical wall
after the bridge.

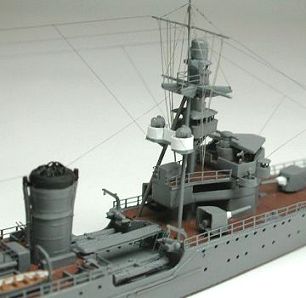
煙突周辺の張り線は、資料不足のためよく分かりません。この周辺の張り線は各艦によってかなり違っていたようです。
I do not
understand the tension line of chimney periphery well due to data
lack. The tension line of this periphery seems to have been
different fairly by each ship.
後部シェルター甲板ですが、キットのパーツの形状が昭和7年の改装時のままですので、パーツをそのままで使用することは出来ません。改装によって、左舷シェルター甲板を横方向に延長していますので、他のキットで左舷を延長してあるものを流用するか、プラ板を切り出してパテを使いながら修正する方法が考えられます。このシェルター甲板はリノリウム張りとなっていますので、罫書き針でリノリウム押えを罫書いた上でリノリウム色を塗装します。
It is not
possible to use the parts of TAMIYA kit as the back shelter deck
because the parts are remodeling as Showa 7. The back shelter deck was
extended toward port side by the modernisation. We can
appropriate the parts of back shelter deck from the other kit
which parts are extended port side. While it is conceivable to
modify using a plastic board and some pate. The back shelter deck
was linoleum stretched and I coated with paint linoleum color
after I wrote metal fitting lines with a needle,
後マストのクレーンですが、開戦当時はトラス構造ではなく棒状デリックであった可能性が高いようです。ちなみに同型艦の「多摩」は、開戦時すでにトラス構造クレーンであったものと写真資料から断定出来ます。
また後マストのヤードは2本となっています(他の同型艦や「長良」型では1本)。艦尾信号燈の位置も各艦によって微妙に違いますから、写真等によって確認して取りつけましょう。
なお、開戦時以降も搭載機は94式水偵のままでした。カタパルトは、ファインモールド社から製品化されている呉式2号3型のエッチングパーツを使っています。このエッチングパーツはかなり組みにくいのですが、さすがに形状や細部のディテールは素晴らしいものがあります。
There's high possibility that the crane of back mast at the
outbreak of war was not truss structure, although it was a bar
derrick. Incidentally We are able to conclude from the photograph
data that already
TAMA the same type ship was a truss structure crane at the
outbreak of war.
Also the
yard of the back mast were 2 sets (other same type ship and
NAGARA class had one yard). The position of stern signal lights
differs subtly by each ship. So, let's confirm and install while
seeing the photograph etc.
Furthermore, the installation aircraft was just KAWANISHI type 94
reconnaissance floatplane even after the outbreak of war. The
catapult was the Kure No.2 Model 3 and I used the photo-etched
parts that are commercialized from Finemold company(Japan).
However these photo-etched parts are difficult to make fairly,
the form and details are excellent.

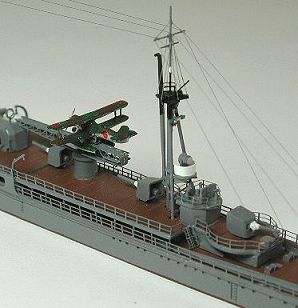
セルター甲板下の支柱を0.3mmφ真鍮線で作ったのですが、写真からは全く見えていませんね(^^;)。後部艦橋には双眼鏡や従羅針儀が設置されていました。ここは普段、キャンバス張りの天幕があったようです。再現してみると、メリハリがついて面白いかもしれません(私は面倒なので、やりませんでした(^^;))。
I made the props under the shelter deck with a 0.3 mmφ brass
rod. But it is not reflected to the photograph at all. The
binoculars and subordinate compass needle cases were placed in
the back bridge. Here seems to have the tent of canvas usually.
If you try to reproduce this tent, your ship will have a lively
atmosphere and may be interesting.
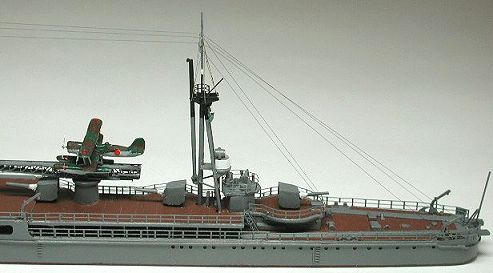
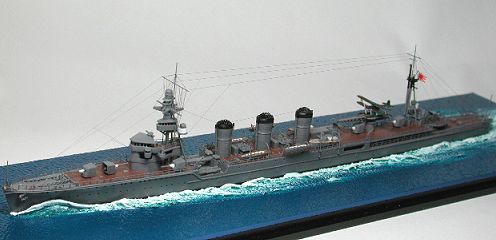
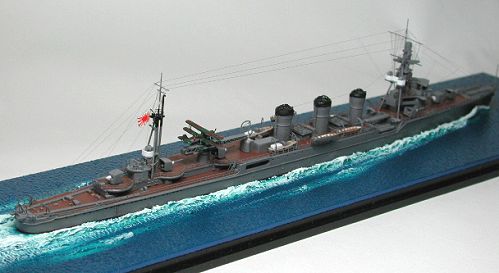
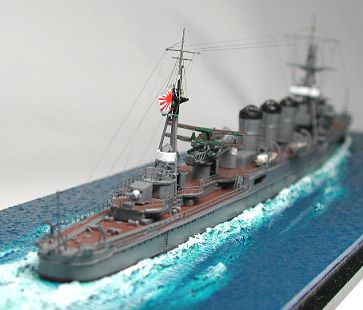
完成後は以下の写真のように、海面と波を簡単に作ってその上にボルトで固定し、アクリルケースに収めて保管しています。
After completion, I store KUMA fixing with some bolts into an
acrylic case. I made the sea surface and wave easily, too.

「球磨」トップページに戻る。→![]()
return to
KUMA top page.