「朝潮」詳細写真
ASASHIO detail images
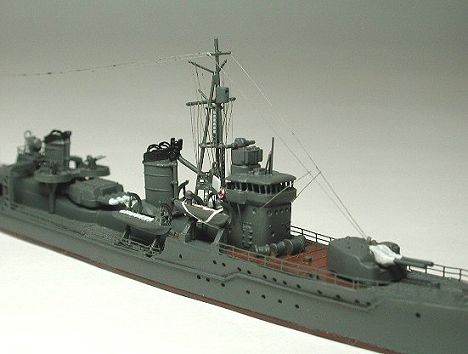
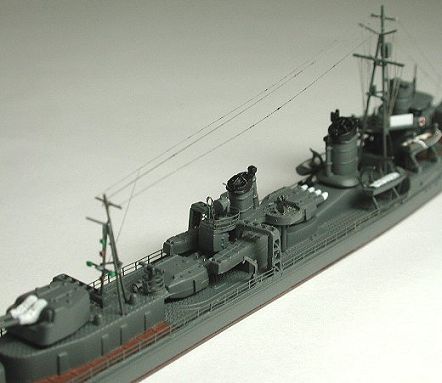
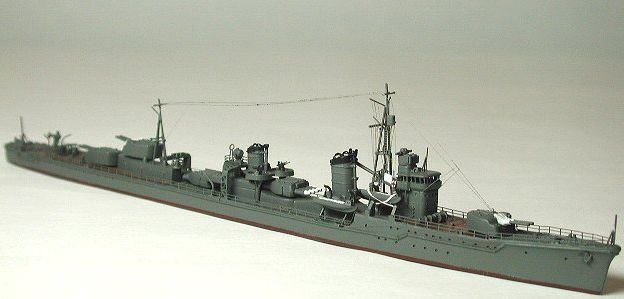
キットの舷窓のモールドが甘いので、貫通しないように気をつけながら0.6mmφドリルで穴をさらってやります。あとはマストを真鍮線に替え、手すり、ラッタル、25mm連装機銃、内火艇ダビッド、爆雷投射台、魚雷積み込みダビット、方位測定儀(リング状アンテナ)等をエッチングパーツにしました。艦橋には両舷に救命ブイをつけています。白と赤の色が単調な外舷色の中でアクセントになっています。
Because the portholes of the kit are slightly shallow, they are
carved carefully with a 0.6 mmφ drill so as not to penetrate.
I change both the front and back mast to a brass rod and also
change the handrails, ladders, the 25mm twin MG, motor launch
davits, depth bomb equipments, torpedo loading derrick,
goniometer antenna ( radio direction finder ) etc. to the etching
parts.
The lifesaving buoys are being attached to both sides in the
bridge. The white and red color are the accent that is
conspicuous in monotonous warship colors.

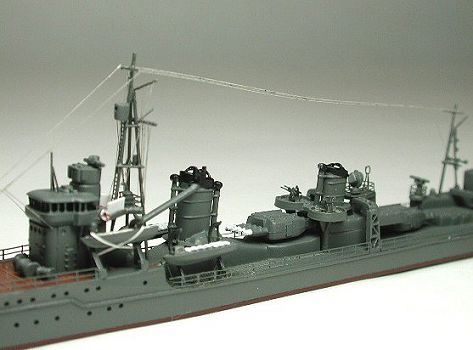
前後煙突の開口部を開口し、雨水除けカバーを0.2mmφ真鍮線で作ります。実艦ではカバーは*状になっていますが、少し間引いて+にした方がスッキリ見えます。後部煙突横のスキッドビームについては、エッチングパーツに替えることを以前はやっていましたが、エッチングパーツでは厚みが足りません。実艦のスキッドビームはもう少しぶ厚くなっていますので、キットのパーツのトラスをくり貫いた方がより実際らしく見えます。なんでもかんでもエッチングパーツというのではなく、実艦の雰囲気に即するようにパーツを加工するという方法もあります。
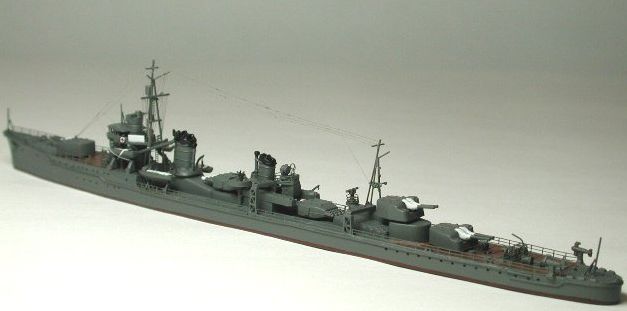
今回高性能デジカメに替えたおかげで、ここまで接写することが出来ました。
I open the front and back funnel mouth and attach the frames for
canvas cover making with a 0.2 mmφ brass rod. In a real ship the
frames for canvas cover have a form of 「*」 but in 1/700 a
form of 「+」 is seemed better to see clean-cut.
Former, although I was changing the skid beams of the back funnel
side to the etching parts, I understood that the thickness of the
etching parts was not sufficient. Because the skid beams of a
real ship is a little bit thick, I am now adopting the method to
whittle and penetrate the truss of the parts of the kit.
Even if it bites whatever changing parts to the etching parts, I
recommend you the method that the parts of a kit are processed so
that they fit the atmosphere of a real ship.
This time I can take a close-up image like these images, due to
use a highly efficient digital camera that can be possible
close-up photography.
